How To Set Printable Area In Excel
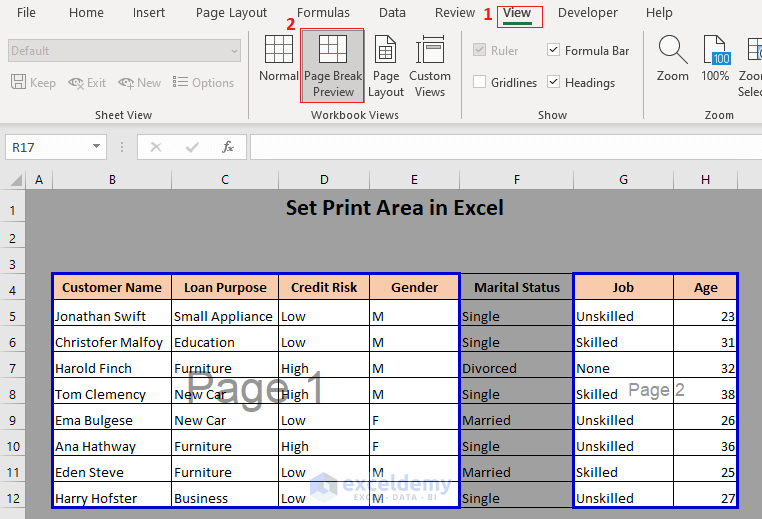
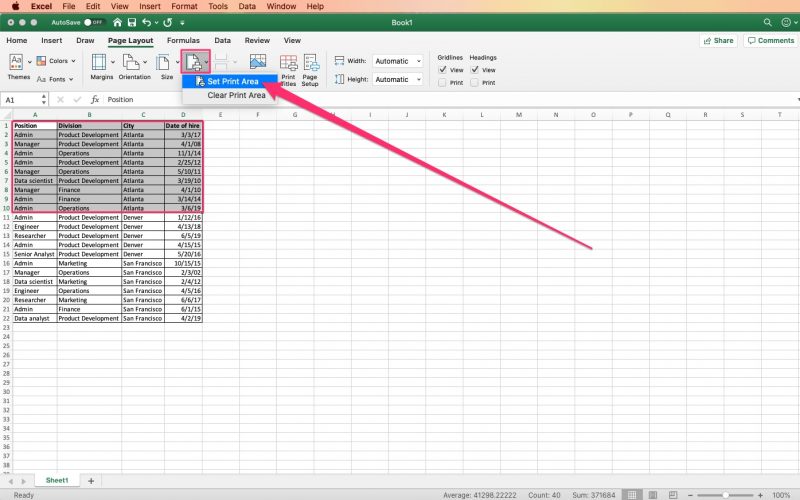
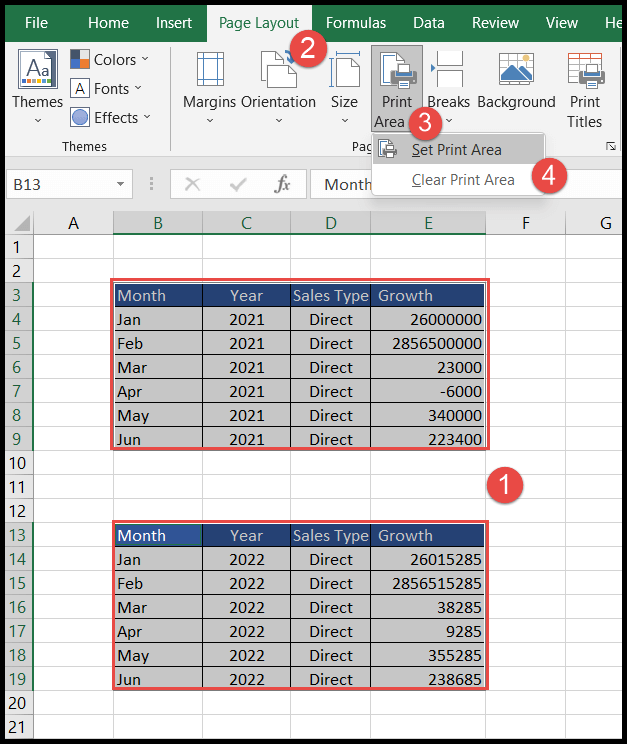
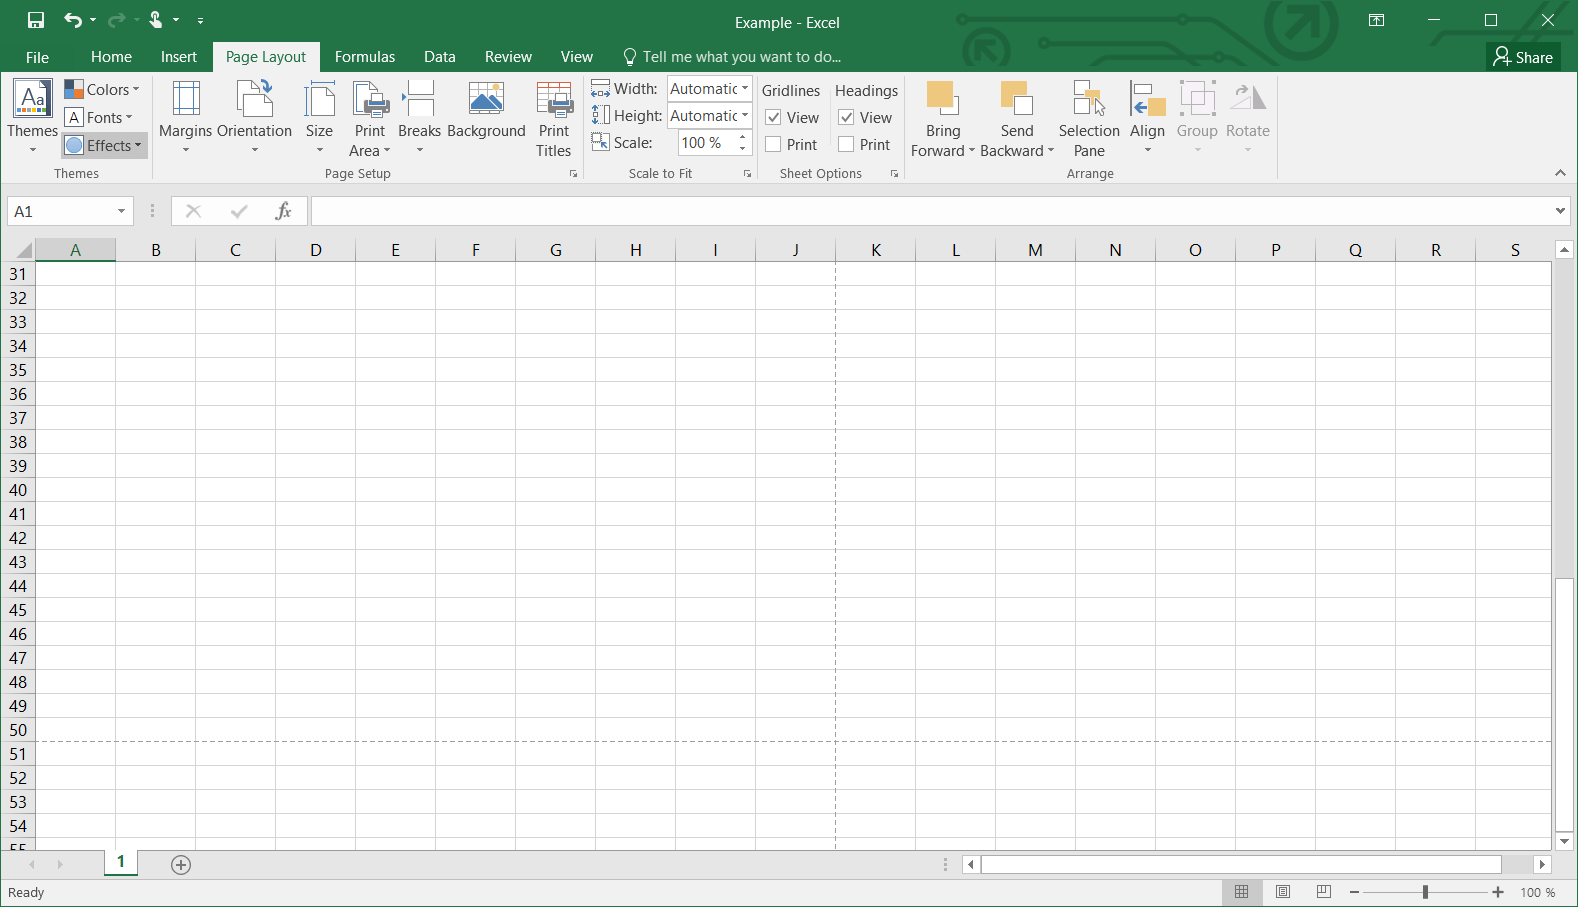
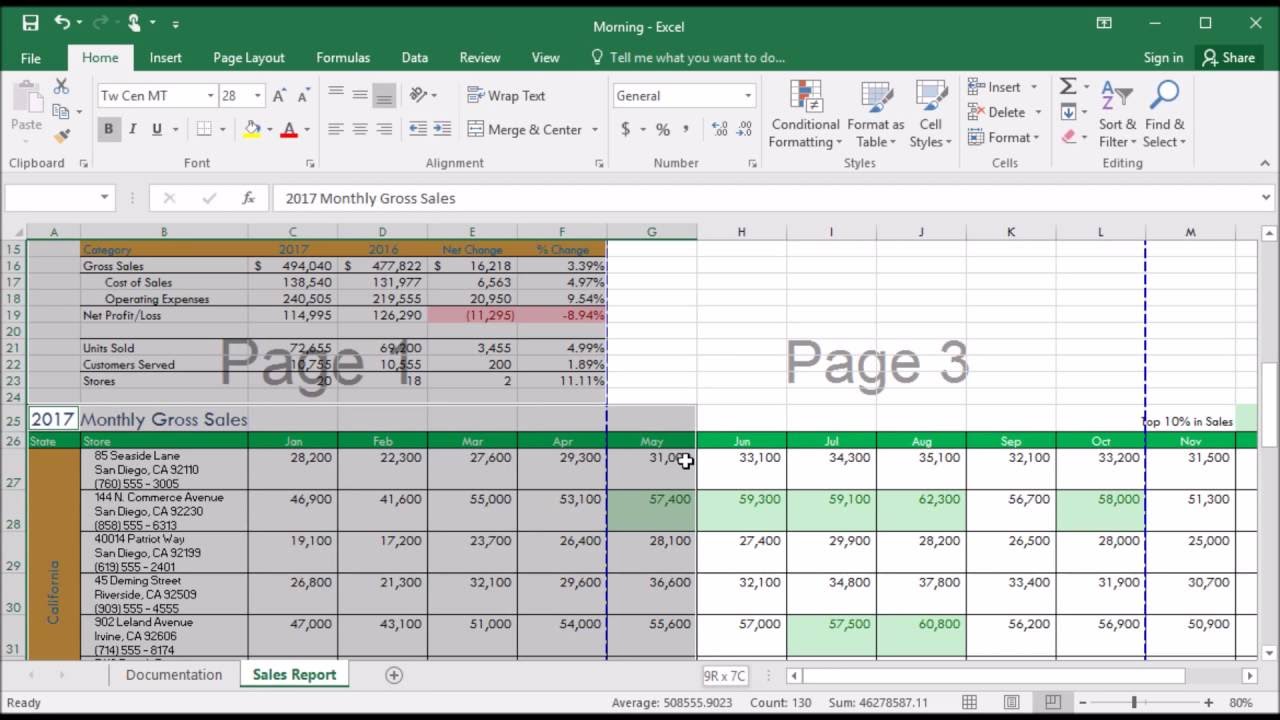
How To Set Printable Area In Excel - Keep watching and print any part of your excel sheet without a hitch!don’t miss out a great. Click on print area under the page setup section. Select the area you want to print highlight the area you want to set as the printable area. Web print area lets you specify exactly what parts of a spreadsheet to print, and then places your selection in the upper left corner of a new page. When you want to print multiple areas: A dark gray border appears around the. Next, click on the print area icon. Select the cells that you want to print. Web today we’ll be talking about how to set the print area in excel. On the page setup group > click print area > set print area. Select the cells that you want to include in the print area. Web here are the steps that will help you to clear or set a print area in excel: Click on the ‘page layout’ tab on the top ribbon in excel,. Web on the worksheet, select the cells that you want to define as the print area. When you. Web print area lets you specify exactly what parts of a spreadsheet to print, and then places your selection in the upper left corner of a new page. On the page setup group > click print area > set print area. Click on the set print area option. Web choose set print area. to set multiple print areas in your. Web on the worksheet, select the cells that you want to define as the print area. A dark gray border appears around the. Web one easy way to set the print area in excel is by selecting the desired range of cells and pressing “ctrl + p” on a pc or “command + p” on a mac. Once a print. Select the cells that you want to print. Select the page layout tab from along the top of the tab menu. Hold down the ctrl key and click to select the areas you want to print. Here we have the steps: Each print area prints on its own page. Web to set the print area, you select the area and hit the set print area command; Next, click on the print area icon. Once a print area is set, add additional print areas by selecting the additional cells, clicking the print area button, and selecting add to print area. Web choose set print area. to set multiple print areas. Web today we’ll be talking about how to set the print area in excel. On the page setup group > click print area > set print area. Here, we selected cells a1 through f13, held the ctrl key, and then selected cells h1 through m13. Select the range you want to print values from the grid. You will know the. To set the print area here, click and drag your cursor to select only the cells containing data that you want to print. Web let’s see how to quickly set the print area to print a specific part of the worksheet. Click on the set print area option. When you want to print multiple areas: On the page setup group. Next, head to the page layout tab and pick. Web choose set print area. to set multiple print areas in your sheet, hold ctrl as you select each group of cells. Keep watching and print any part of your excel sheet without a hitch!don’t miss out a great. Select the range you want to print values from the grid. A. Select the range you want to print values from the grid. On the page layout tab, in the page setup group,. Web one easy way to set the print area in excel is by selecting the desired range of cells and pressing “ctrl + p” on a pc or “command + p” on a mac. Keep watching and print any. Next, head to the page layout tab and pick. On the page setup group > click print area > set print area. Once a print area is set, add additional print areas by selecting the additional cells, clicking the print area button, and selecting add to print area. Click on print area under the page setup section. Select the cells. Web choose set print area. to set multiple print areas in your sheet, hold ctrl as you select each group of cells. Select the area or cells on the worksheet that are to be printed. Web let’s see how to quickly set the print area to print a specific part of the worksheet. Each print area prints on its own page. On the page layout tab, in the page setup group,. On the page setup group > click print area > set print area. You will know the print area is set when you see the gray lines outlining your selection. Keep watching and print any part of your excel sheet without a hitch!don’t miss out a great. Next, head to the page layout tab and pick. Click the print area button. Web one easy way to set the print area in excel is by selecting the desired range of cells and pressing “ctrl + p” on a pc or “command + p” on a mac. Web today we’ll be talking about how to set the print area in excel. Each print area prints on its own page. Microsoft) setting the print area can also be done by going to the “page layout” tab and selecting. Click on the ‘page layout’ tab on the top ribbon in excel,. Here we have the steps: Next, click on the print area icon. Make sure you include all the relevant cells and columns that you want in the printout. To set multiple print areas, hold down the ctrl key and click the areas you want to print. Web here are the steps that will help you to clear or set a print area in excel: Next, click on the print area icon. Each print area prints on its own page. Click on the ‘print area’ button in the ‘page setup’ group. Select the area or cells on the worksheet that are to be printed. Microsoft) setting the print area can also be done by going to the “page layout” tab and selecting. Click the print area button. Web click the page layout tab. A dark gray border appears around the. Select the cells that you want to print. To set multiple print areas, hold down the ctrl key and click the areas you want to print. On the page layout tab, in the page setup group,. Click on the ‘page layout’ tab on the top ribbon in excel,. Select the page layout tab from along the top of the tab menu. Web to set the print area in excel, follow these steps 1. Next, head to the page layout tab and pick. Click print area > set print.:max_bytes(150000):strip_icc()/ExcelSetPrintArea-5c23d199c9e77c0001adc722.jpg)
How to Set Print Area in Excel
How to Set Print Area in Excel (5 Methods) ExcelDemy
How to set a print area in Microsoft Excel to print a specific section
How to Set Print Area in Excel (Add, Clear, and Ignore)
:max_bytes(150000):strip_icc()/ExcelClearPrintArea-5c1c287ac9e77c000159666f.jpg)
How to Set Print Area in Excel
How to set print area in excel dastquiz
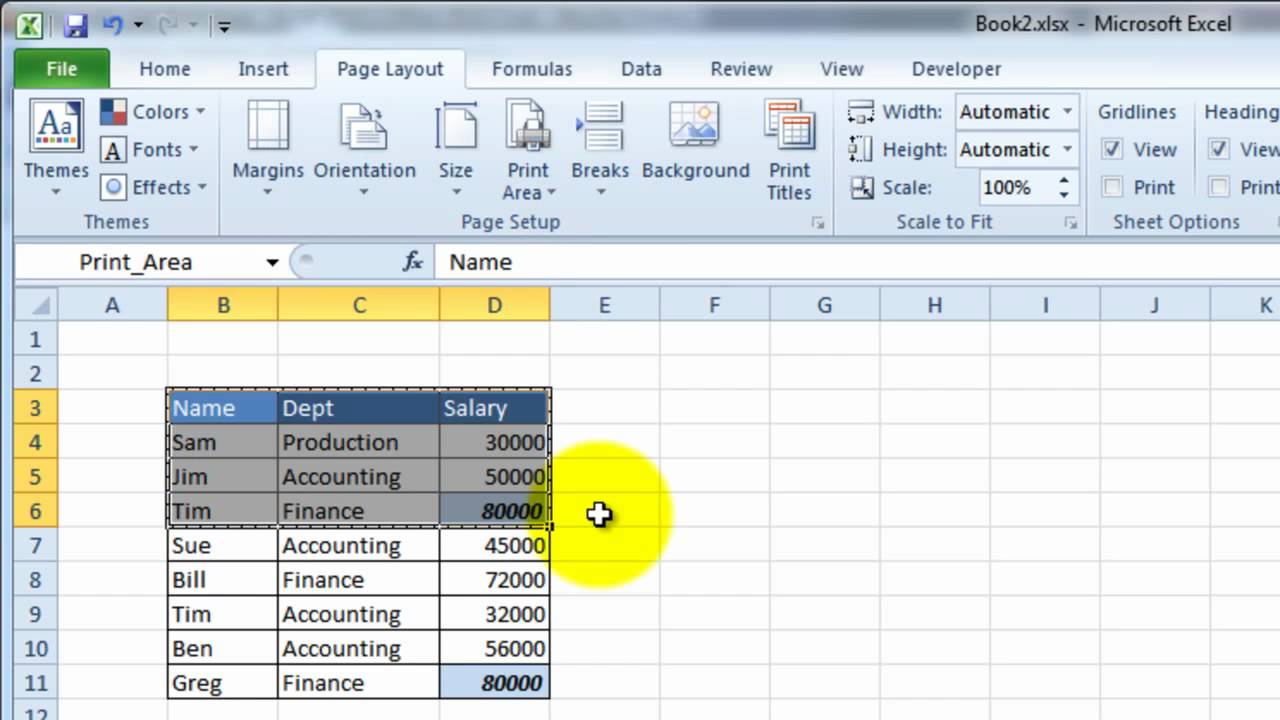
VideoExcel How to manually set the print area in Excel 2010 YouTube
233 How to set print area in Excel 2016 YouTube
:max_bytes(150000):strip_icc()/ExcelPageBreakPreview-5c1c28c8c9e77c00017a2ade.jpg)
How to Set Print Area in Excel
How to Set the Print Area in Excel (Step by Step) YouTube
Once A Print Area Is Set, Add Additional Print Areas By Selecting The Additional Cells, Clicking The Print Area Button, And Selecting Add To Print Area.
Click On The Set Print Area Option.
Select The Range You Want To Print Values From The Grid.
Make Sure You Include All The Relevant Cells And Columns That You Want In The Printout.
Related Post: